Step-by-Step Guide: Registering Your Baby’s Birth and Citizenship in Colombia
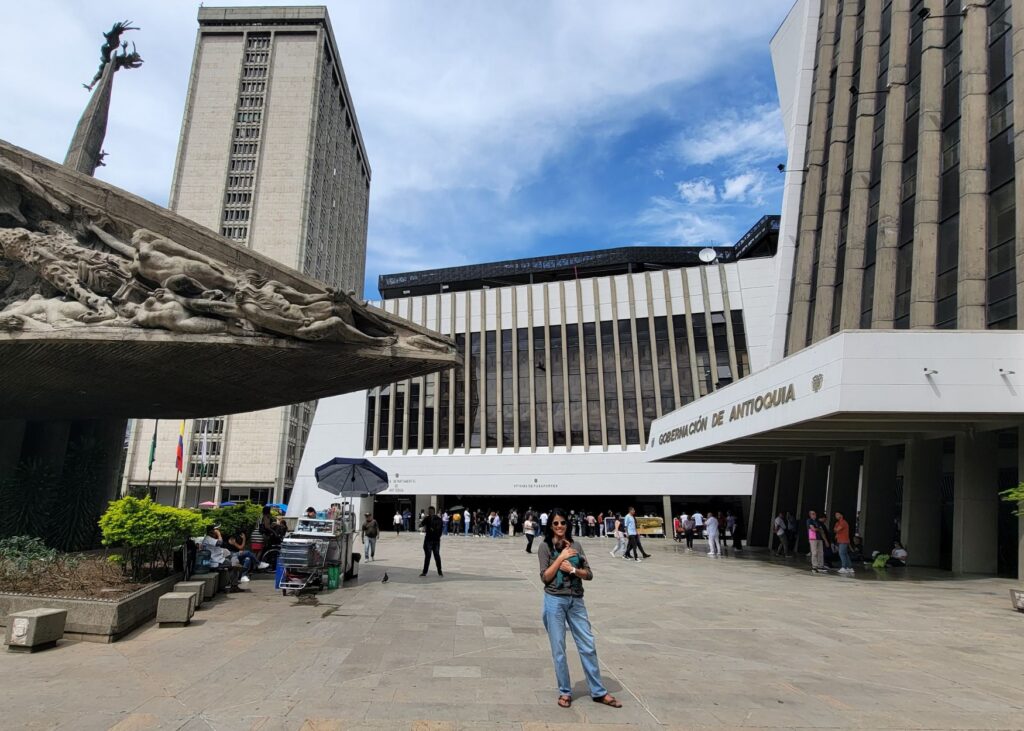
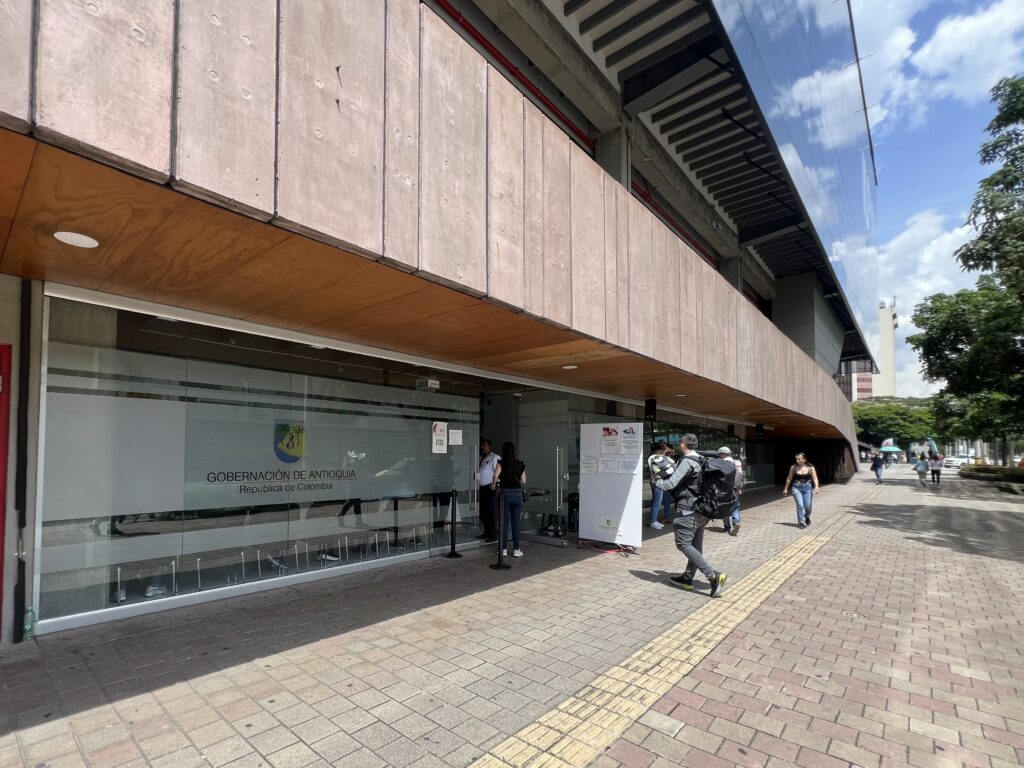
In the Centro Administrativo La Alpujarra and the passport agency behind me
This post may contain affiliate links. Read my full disclosure here.
Congrats on the arrival of your sweet little one! To ensure your baby’s birth and citizenship are official in both Colombia and your passport country (if not Colombia), you must obtain their registro civil de nacimiento (birth certificate) first. Once you have this, you can get their Colombian passport and begin registering them in your passport country. This post details how to get their Colombian birth certificate and passport, including the required documents.
For context, I am a Colombian citizen, having received my citizenship through my mother, who was born and raised in Bogotá. My partner has an M visa, and our marriage is recognized in Colombia through our registro civil de matrimonio. Even if you and your partner have different documentation, this post will help you understand what to expect and the similar paperwork required. For foreigners, you’ll need to register your child’s birth at a Registraduría. A friend recommended this one in El Poblado.
Please refer to the Registraduría’s website for more details on what you need based on how you reside in Colombia. Note that Colombia does not offer birthright citizenship.
You have two options to get your child’s registro civil de nacimiento:
Before leaving the hospital: If at least one parent is a Colombian Citizen, a notary can help file and submit the registration (except on Sundays).
At a notaría or registaduría of your choice: Within a month of the child’s birth; otherwise, certain documentation will expire.
Be aware that the notary representative at the hospital may be from a notaría far from where you live. Notarías in Colombia don’t share information – not even with the notaría primera in Bogotá.* The notaría where you submit the registration is the only place where you can handle any related paperwork for your child’s birth certificate. It’s important to ask the notary representative which notaría they are from so you don’t end up stuck with an office on the other side of the city. When I asked the notary representative where parents should go if neither of them are citizens but are instead in Colombia on visas, she recommended the Registaduría as opposed to a regular notary.
*However, if you receive any registro civil at a Colombian consulate, the notaría primera in Bogotá is the only notaría in Colombia you can get copies from.
I opted to do it at the notaría where we registered my son, which was different from the hospital notary representative’s home office.
What You Need to Bring
Baby: Footprints are taken at the appointment
Lab results: Showing blood type and Rh factor
Certificado de nacido vivo
Your cédula and a photo copy of the cédula
Your partner, their cédula or passport, and a photo copy of their identity document
Your registro civil de matrimonio
A copy of your partner’s visa (not needed but brought just in case)
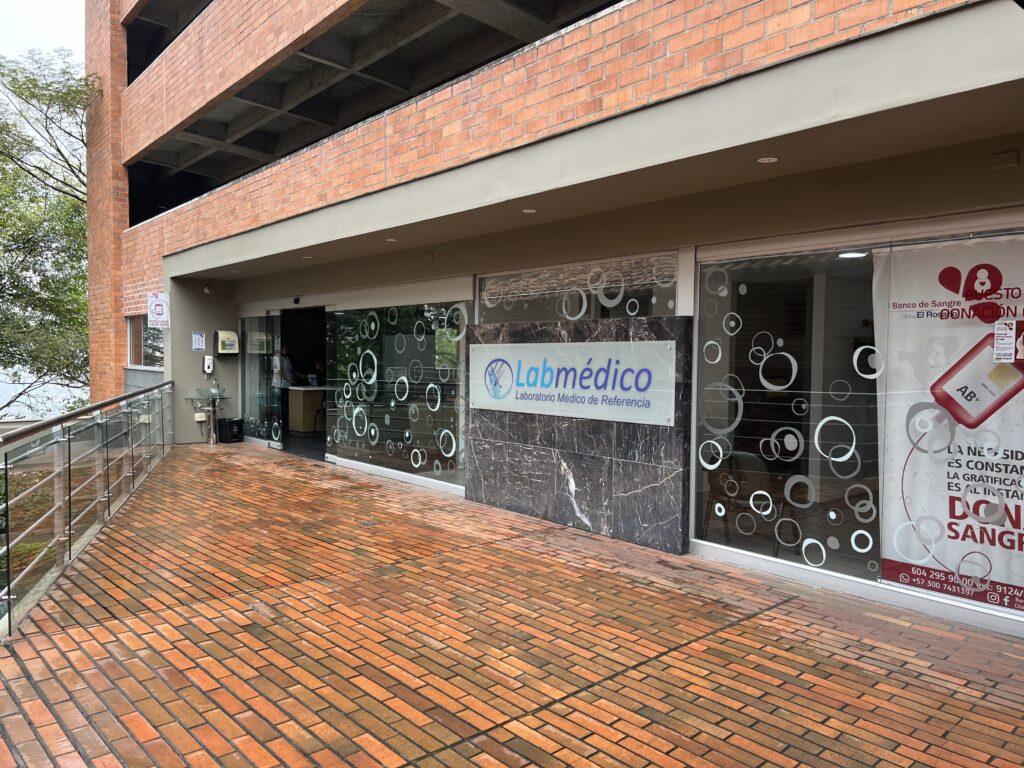
On the day my babies were born, my gynecologist gave me a “Certificado de nacido vivo.” The notary keeps the original, and the copy is for your records. Additionally, lab work showing the baby’s blood type and Rh factor is submitted. The first time, I picked up the results at Clinica El Rosario 2-3 days after I was discharged. The second time, I stopped at the laboratory (Labmédico) on our way out to provide my email address. It’s located on the left-hand side next to “Doggers” as you exit the hospital and approach the parking garage. I received the results via email the day after we were discharged.
Labmédico office at Clinica El Rosario sede Tesoro
At the appointment
At the notary, there’s a dedicated desk for “registro civil.” You can’t make an appointment so it’s good to get there early when it is less likely that there is a line. We provided the agent with the documents listed above, and he asked for:
Child’s full name
Address
Phone number
While completing the information, the agent asked my partner to complete his biometrica (biometrics). This legal requirement guarantees the highest security in terms of identification for notarial procedures by comparing fingerprints against the National Registry of Civil Status database. (Source) Once this was complete, my partner signed the registro civil, and the agent took my baby’s footprints.
The agent then printed the four copies of the registro civil I requested, stamped, and dated each copy. These copies were for:
Colombian passport application
U.S. Consular Report of Birth Abroad (CRBA) & Passport application (two copies)
To keep in my passport holder. Colombian migración agents and airlines often request the registro civil de nacimiento to prove parentage to mitigate child trafficking and ensure children’s safety, even when both parents are traveling with the child. I always carry physical copies for all three kids.
We paid 59,700 COP for the four copies and then walked over to the side of the room where the notary finally signed.
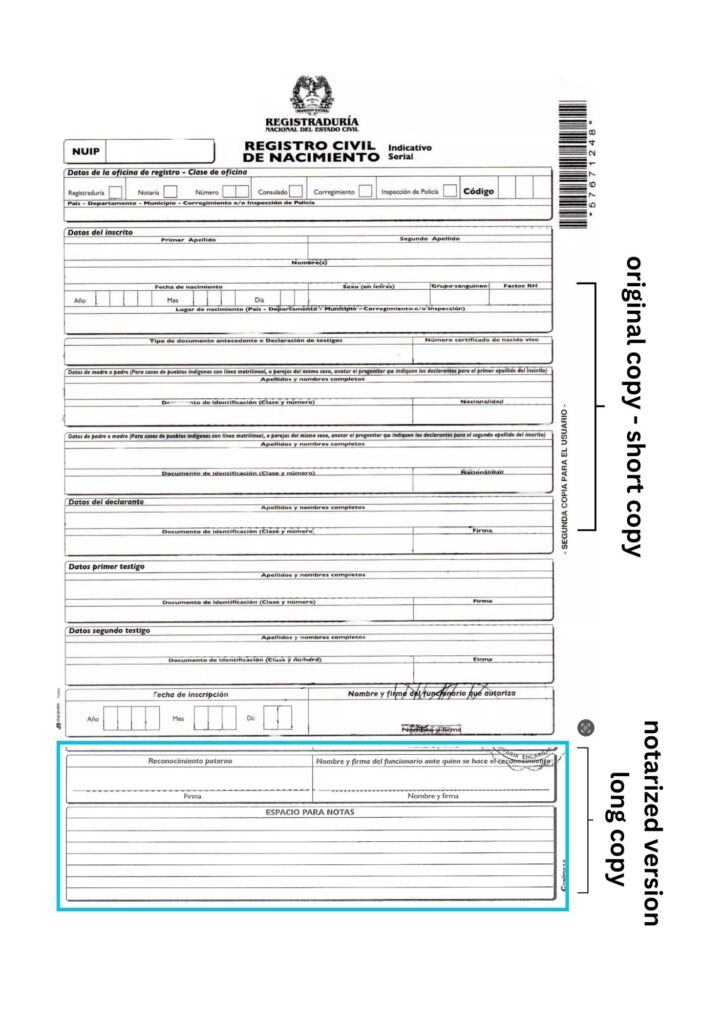
The notarized version is both the original copy plus the box highlighted in blue and sometimes referred to as the “long” copy.
When you leave the notaría, you’ll receive the original copy, or the top part of this document along with the notarized copies. Save it for your records.
I brought both the original and the long, notarized copy to my passport appointment.
Things to Note
Timeframe: You have one month from your baby’s birth to get the registro civil de nacimiento; otherwise, certain documents will expire.
NUIP: You’ll receive the número único de identificación personal (NUIP) on the top left-hand side of the document, necessary for your baby’s first pediatric appointment and other follow-up appointments.
Lab results: These also include the hormona estimulante de la tiroides (TSH) results, which test for thyroid problems. Your pediatrician will ask for these results at your baby’s first visit, 2-3 days after discharge.
Insurance: Once I had the registro civil de nacimiento, I forwarded it to my insurance agent to add my baby to our insurance plan.
The portal opens weekdays at 8 am with approximately 1,300 appointments available for the next 2-3 business days and it books up fast. One morning, I had issues with Bancolombia, and by 8:07 am, all slots were taken. I had to try again the next day.
You can pay using PSE or Efecty. I used Bancolombia via PSE, and the payment processed immediately.
Remember the date of the first payment; you’ll need it to schedule your appointment.
Print the confirmation of payment email and bring it with you to your appointment.
Step 2: Schedule appointment
Once your payment is accepted, use this website to schedule your appointment.
You’ll need:
Your child’s NUIP
Date of the first payment
Type of passport requested
Select the date and time
Things to Note
Be prepared with dates and times that work best for you within 2 days of applying. You don’t have time to consult your calendar during this step or you run the risk of losing appointments, being timed out, and then having to try again the next day.
You can’t book more than 2-3 days in advanced. For example, if you’re booking on a Monday and are not available to attend an appointment until the following Tuesday (8 days later), I would recommend taking this step on Thursday or Friday instead.
I was able to make my deposit and schedule our appointment in the same day, a Wednesday. Our appointment was scheduled 2 days later, that Friday.
Print the confirmation of your scheduled appointment email and bring it with you to your appointment.
Step 3: Go to appointment, make final payment
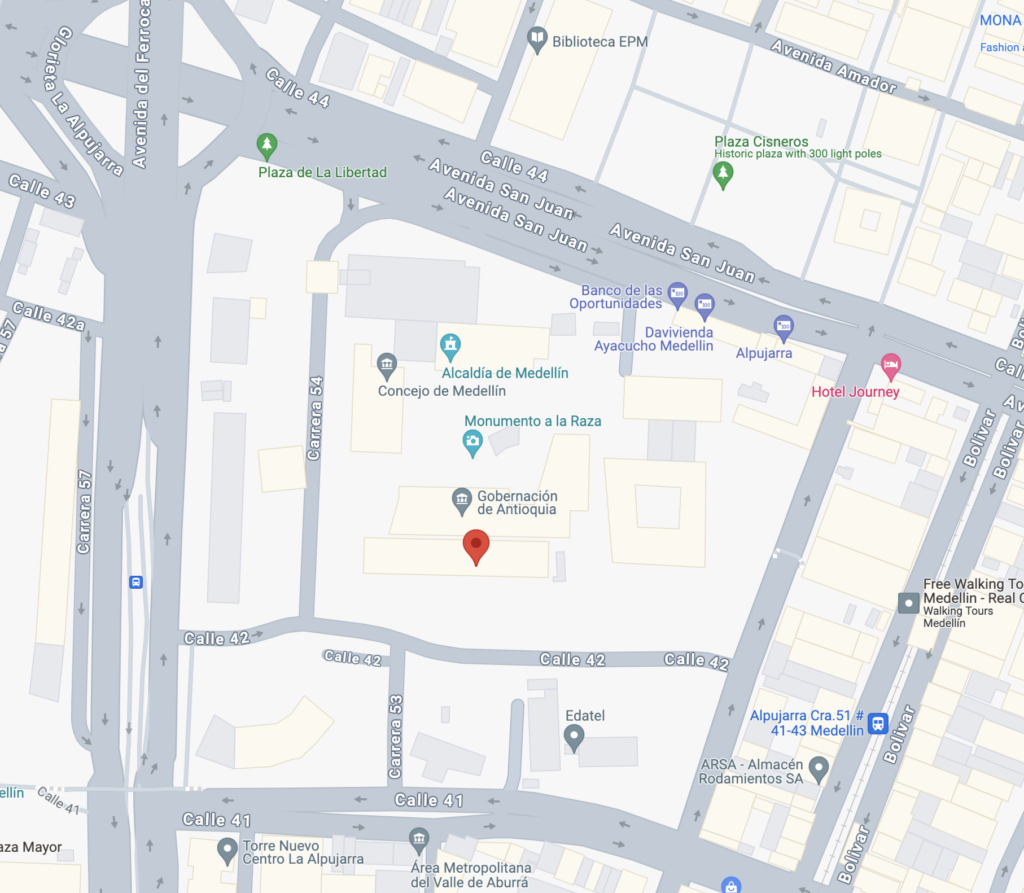
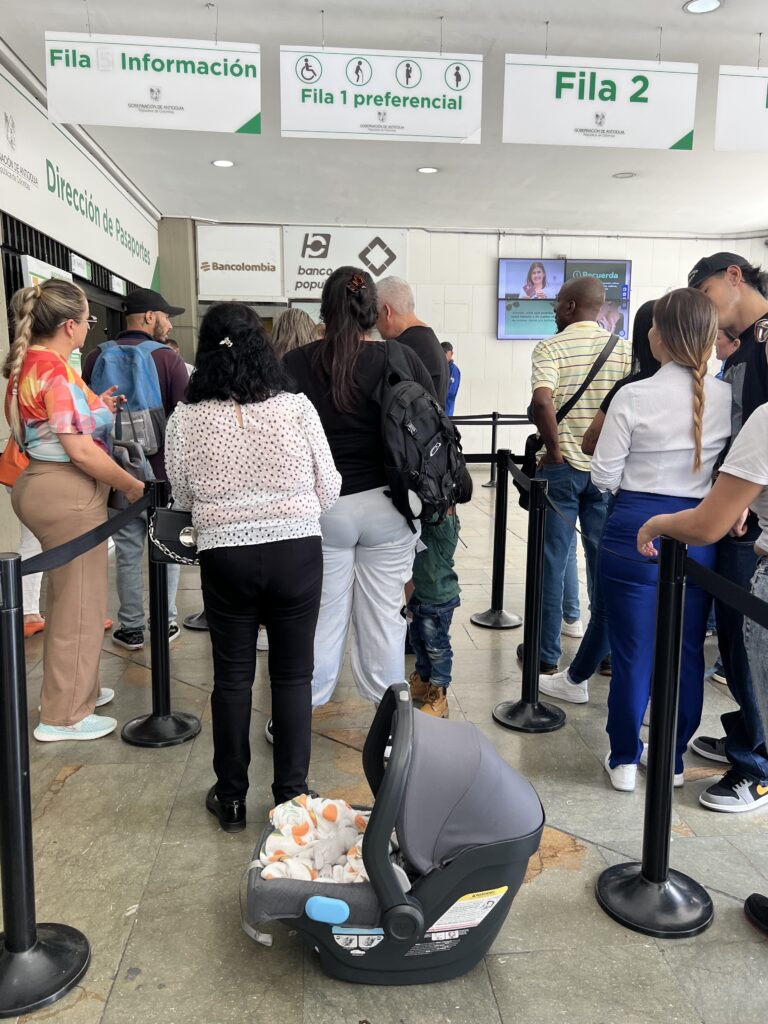
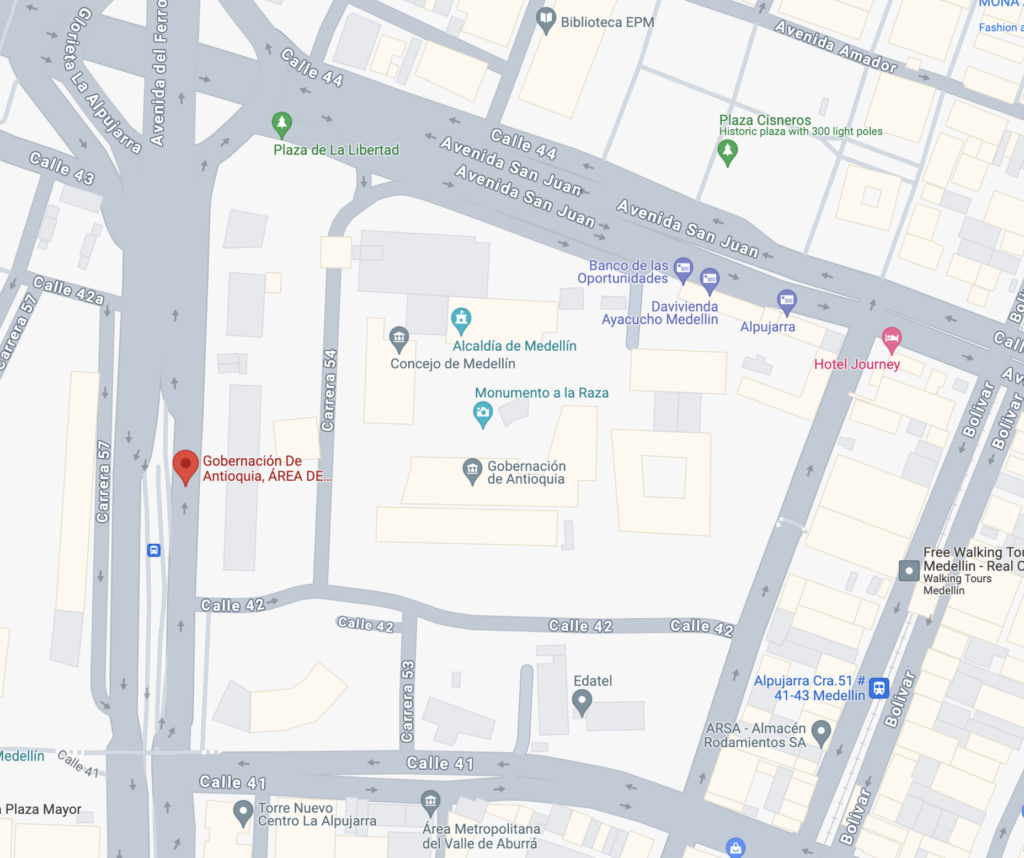
The passport office is located at Gobernación de Antioquia on the first floor, at Calle 42 #52-106. As the Colombian citizen, my partner didn’t have to come with me but he did just in case.
Based on my experience obtaining my son’s passport in Colombia, I knew what to bring. Also based on my experience of doing anything in Colombia and to avoid multiple trips, I brought extra documents just to be safe.
What I Definitely Needed:
Baby: They take the baby’s picture at the appointment
A soft, thick baby blanket: To cushion the baby when they take her photo (they provide a white sheet for the background)
Baby’s registro civil de nacimiento: The legal paper size, notarized version
Copy of my registro civil de nacimiento: Doesn’t have to be a recent copy
My cédula and a copy
A copy of my mother’s cédula: Since I got my citizenship through her
Final payment in cash: Must be in cash. If you don’t have cash, the nearest Bancolombia cajero (ATM) can have long lines depending on the day and time.
What I Also Brought Just in Case
Baby’s registro civil de nacimiento: The original, short version
A copy of my partner’s cédula
A copy of my partner’s visa
A copy of our registro civil de matrimonio
Electoral certificate: If you voted in the last election, you get a 10% discount on the second payment.
At the Passport Office:
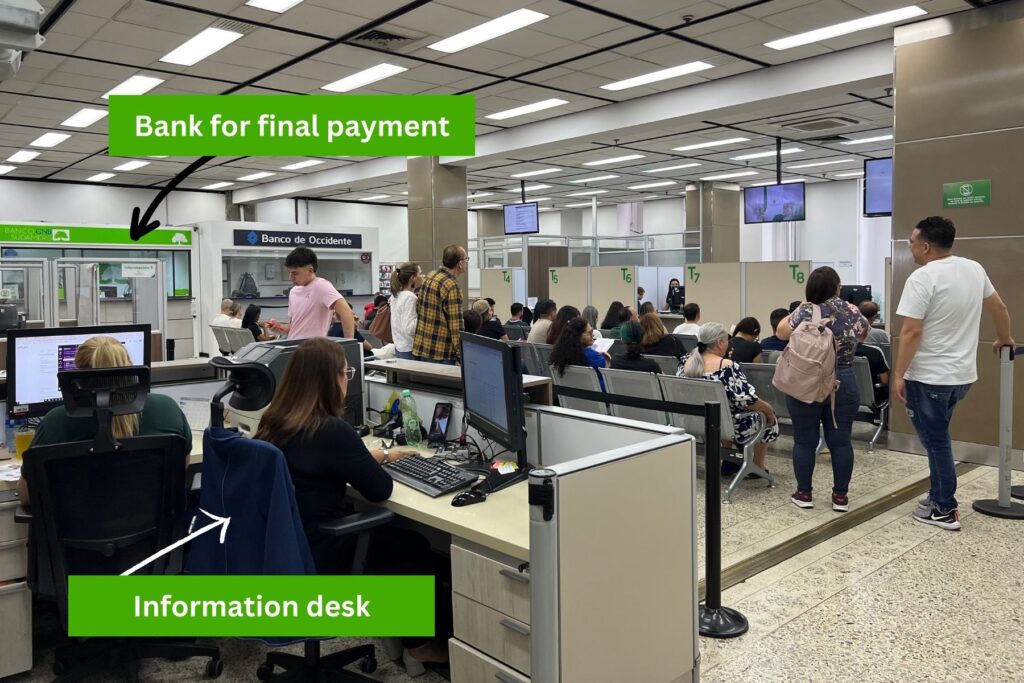
When you arrive, be sure to go to the “Fila Preferencial” (priority line) for the elderly, people needing special assistance, pregnant persons, and those with young children. Someone will check you in to verify your appointment and documentation. Then, you’ll head over to the information desk where they will begin processing your paperwork.
For me, this involved waiting 15 minutes while the agent requested information from the main office in Bogotá about my mother (since I got my citizenship through her). Once they had the necessary information and printed the document I needed, we waited until called to the next agent.
I provided all the documents, and the agent entered our daughter’s information for her passport. After a few minutes, we laid the baby blanket on the desk, the agent placed the white background sheet over it, and laid our daughter down for her photo. In Colombia, they want the baby’s eyes open, even if they are under 1 year old, so it helps to wake the baby up in advance.
Once you confirm the information entered, you sign, and proceed to make the final payment (in cash) in the same office near the main entrance. Hold onto the receipt to show proof of payment when you pick up the passport.
Step 4: Pick up passport
Last step! Both times I’ve applied, the passports were ready in a week. The passport pickup office is around the corner from where you apply. The address is Carrera 55 # 42-56 / Plaza de La Libertad / Local 4256. In my case, since I’m the Colombian citizen only I could pick up the passport.
Office hours are:
Monday to Thursday: 7:00 a.m. to 5:00 p.m.
Friday: 7:00 a.m. to 4:00 p.m.
Saturday: 8:00 a.m. to 12:00 p.m.
What You Need:
Bring your baby: This allows you to skip the line, as parents with children get priority preference
Receipt confirming final passport payment
Notarized copy of the baby’s registro civil de nacimiento: Can by physical or digital. They ask for the NUIP before going back to grab the passport.
I received an email two business days after our appointment informing me that my child’s passport was ready for pickup. When you arrive, there’ll usually be someone at the door confirming you have your receipt. If you bring baby, you get to skip the line and wait to be called by the next available agent. Simply show them your final payment receipt, they’ll ask you to confirm the NUIP, and then they’ll go back to get your passport. Review it to confirm all the information is correct, then you’re good to go!
Registro Civil de Nacimiento + Passport Cost breakdown:
Item
Cost (COP)
Four notarized copies of the registro civil de nacimiento (~15.000/copy)
59.700
First payment for ordinary passport
172.000
Final payment for ordinary passport
136.000
Total:
367.700 COP or
~$95 USD
On to the next!
I hope this has been helpful for you to get an idea of what to expect when applying for your child’s birth certificate and passport!
A good time to let you know that in Colombia once your child turns 7 years old, they required to get a tarjeta de identidad. At this time you’re also required to get a new passport. Here’s information on the tarjeta de identidad and here’s information on the passport requirements.
As a U.S. citizen, my next step was applying for their Consular Report of Birth Abroad (CRBA), U.S. passport, and social security number. The CRBA is their birth certificate and you need their U.S. passport in order to enter the United States when traveling from Colombia. Learn more about that process in my blog post CRBA, Passport, and Social Security: A Guide to U.S. Citizenship for Children Born in Colombia.
Welcome! I’m Sarah. I started this blog to be a resource for others around a few of my favorite things: living in Colombia, DIY projects, places traveled, and day-to-day life. My hope is that it can a place of inspiration and encouragement to help you plan the next project or adventure of your own!